


If your shoulder is newly swollen or sore from a fall, a strain, or a tendonitis flare, reach for ice first. Use it in short 15 to 20 minute sessions with a barrier between the pack and your skin. Once swelling calms down, usually around 72 hours in, switch to heat to loosen stiff muscles and get your range of motion back.
TL;DR:
- Cold therapy is most effective within the first 72 hours after shoulder injury, especially for swelling and pain from sprains, bruises, or tendonitis flare-ups.
- Use a contoured wrap that covers both the front and back of the shoulder to target deep-inflammation areas like the subacromial space for better relief.
- Switch to heat therapy only after swelling decreases, typically around three days, to loosen tight muscles and improve range of motion.
- Ensure proper application by wrapping packs in a barrier, limiting sessions to 15-20 minutes, and avoiding direct skin contact to prevent burns or frostbite.
- If symptoms persist beyond a week, worsen, or are accompanied by numbness, deformity, or weakness, see a healthcare professional promptly.
Table of Contents
- When Should You Use Ice for Shoulder Pain?
- When Should You Switch to Heat for Shoulder Pain?
- How Do You Apply Ice or Heat to a Shoulder Safely?
- When Should You Stop Icing and See a Doctor?
- Why Shoulder Wrap Design Actually Matters
- A Realistic 72-Hour Routine for a Sore Shoulder
- Get the Right Tool for the Job
- A Few More Reliable Reads
- Sources
- FAQ
When Should You Use Ice for Shoulder Pain?
Ice is your first move whenever a shoulder is freshly hurt, swollen, or throbbing. Cold narrows the blood vessels near the surface, which slows blood flow to the area, and it dulls the nerve signals that carry pain to your brain. That’s why ice packs numb pain and calm swelling so effectively in the first day or two after an injury.
You’ll get the most benefit from cold therapy shoulder treatment in these situations:
- A new sprain or strain from lifting, throwing, or a sudden twist
- Bruising or swelling after a fall or direct hit
- A flare-up of shoulder tendonitis or bursitis with visible puffiness
- Post-workout inflammation after an unusually hard training session
MedlinePlus recommends icing the shoulder for 20 minutes at a time, three to four times a day, and that guidance holds up well against other clinical sources. Some patient resources stretch that window further, suggesting ice for the first 72 hours or until swelling visibly drops. Either way, stop immediately if your skin goes numb or the pain gets sharper instead of duller.
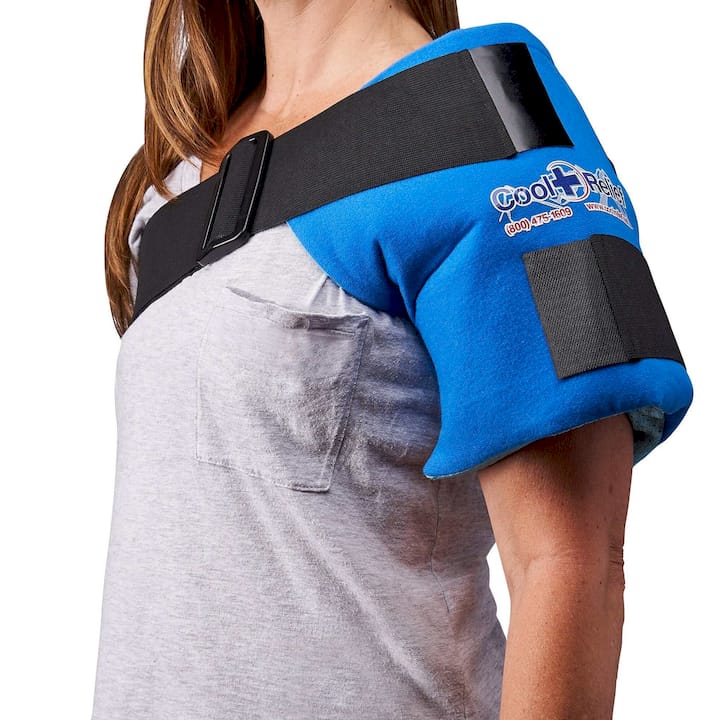
A flat ice pack laid across the top of your shoulder misses most of the inflamed tissue. Rotator cuff icing works better with a contoured wrap that reaches both the front and back of the joint, since swelling from bursitis or a cuff injury often sits deep in the subacromial space, not just on the surface.
When Should You Switch to Heat for Shoulder Pain?
Heat takes over once the acute swelling has faded and stiffness becomes the main problem. Where cold shrinks blood vessels, heat opens them up, pulling more blood into tight muscles and helping them relax. That shift in blood flow is why heat therapy works best for chronic pain and persistent stiffness rather than fresh injuries.
Most clinical guidance points to the same rough timeline: hold off on heat until active swelling has calmed, typically around the 72 hour mark. Jumping to heat too early on a still-swollen shoulder can make inflammation worse instead of better.
Heat therapy tends to help most with:
- Frozen shoulder stiffness that limits how far you can lift or rotate your arm
- Chronic tendonosis, where pain has lingered for weeks without fresh swelling
- General muscle tightness before stretching or light activity
- Warming up a stiff joint before physical therapy exercises
Moist heat, whether from a warm shower, a bath, or a damp heating pad, tends to loosen tight shoulder muscles better than dry heat. Keep sessions to 15 to 20 minutes, and avoid dialing the temperature up too high just because it feels good in the moment. A burn heals slower than the stiffness you were trying to fix.
How Do You Apply Ice or Heat to a Shoulder Safely?
Getting the technique right matters as much as picking the right temperature. Here’s a straightforward routine to follow:
- Wrap the pack in a thin towel or use an insulated therapy wrap. Never place ice or heat directly against bare skin — that’s how you end up with frostbite or a burn instead of relief.
- Set a timer for 15 to 20 minutes and stop when it goes off, even if it feels like it just started working.
- Let your skin return to normal temperature before applying anything again, usually an hour or more.
- Position the wrap so it covers both the front and back of the shoulder joint, not just the top. This matters more for shoulder ice therapy than for almost any other joint, since the rotator cuff and bursa sit in a pocket that a flat pack simply can’t reach.
- Move gently between sessions. A little pendulum swing or light arm movement keeps the joint from stiffening up while you rest.
Pro Tip: Keep two gel wraps in rotation. One stays in the freezer while the other is in use, so you’re never waiting around for a pack to re-cool between sessions.
If you have diabetes, poor circulation, an open wound, or reduced sensation in your arm, talk to a doctor before starting any home ice or heat routine. Numbness or nerve damage can hide the early warning signs of a burn or frostbite until the damage is already done.
When Should You Stop Icing and See a Doctor?
Home treatment works for most shoulder pain, but a handful of signs mean it’s time to get checked out instead of pushing through with more ice or heat.
- You can’t lift your arm above shoulder height or rotate it normally
- Pain is severe, or it’s getting worse instead of better
- You notice numbness, tingling, or weakness running down your arm
- The shoulder looks visibly deformed or sits differently than the other side
- You develop a fever along with the shoulder pain
If you don’t see any improvement after three to seven days of consistent icing, or the pain worsens despite doing everything correctly, that’s your signal to call a doctor rather than wait it out. Severe symptoms like numbness or deformity warrant urgent care right away; milder but stubborn pain is a good reason to book with your primary care provider or an orthopedic specialist. For guidance on telling ordinary strain apart from something more serious, this breakdown of warning signs after an injury is a useful read.
A clinician will typically run through a physical exam, check your range of motion, and may order imaging if a rotator cuff tear or structural issue is suspected. Conservative care, rest, ice, over-the-counter pain relievers, and physical therapy, resolves most shoulder problems without needing surgery, but that’s a call worth letting a professional make once home treatment stops moving the needle.
Why Shoulder Wrap Design Actually Matters
A pack that only touches the top of your shoulder is fighting half a battle. Inflammation from a rotator cuff injury or bursitis usually wraps around the joint capsule, front and back, so a wrap built to cover both sides reaches tissue a flat pack never touches.
A few design details make a real difference in how well cold or heat actually reaches the joint:
- Front-and-back coverage targets the subacromial space where most shoulder inflammation actually lives, not just the surface
- Soft gel packs mold to the curve of your shoulder instead of sitting stiff against it, so the temperature spreads more evenly
- Reusable, refreezable gel means you’re not stuck buying disposable packs every time you need relief
- Insulating layers and adjustable straps keep the wrap secure through movement while protecting your skin from direct contact
Good design isn’t a luxury here. It’s the difference between icing the surface and actually icing the injury.
A Realistic 72-Hour Routine for a Sore Shoulder
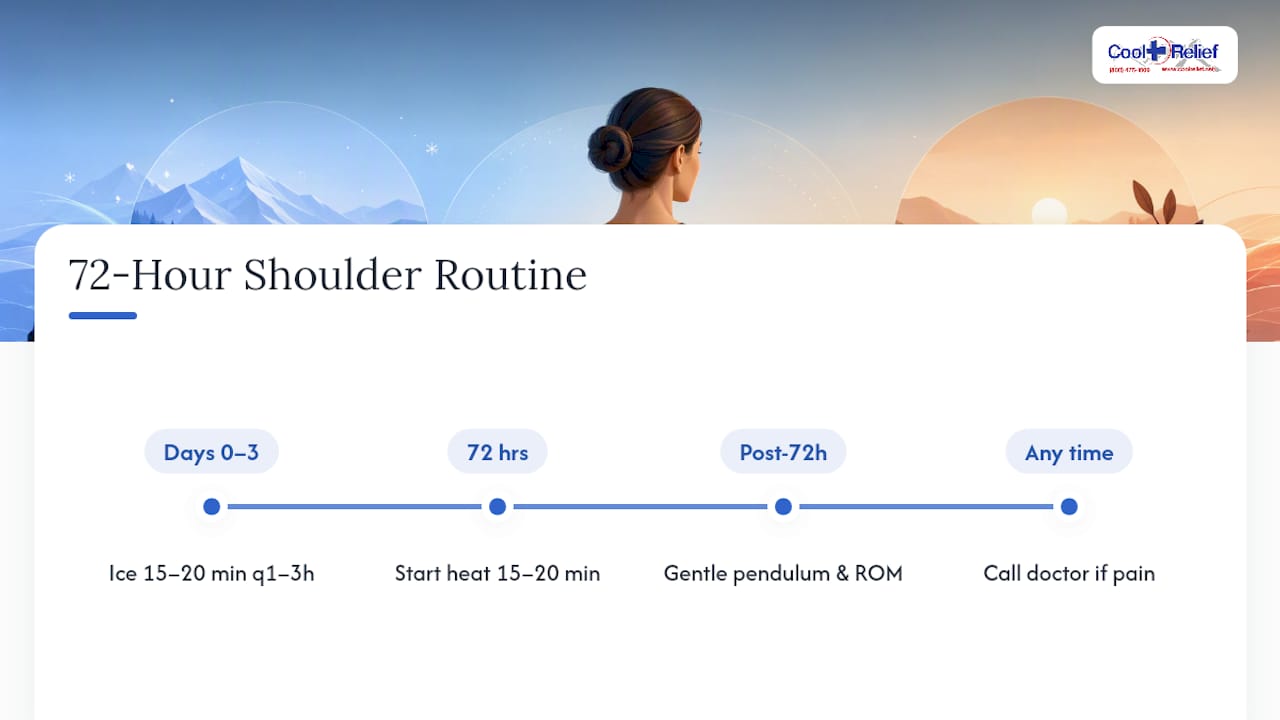
For the first three days, ice for 15 to 20 minutes every one to three hours, and skip overhead lifting or reaching while you rest. Once swelling starts to drop, usually around the 72 hour mark, bring in 15 to 20 minute heat sessions before doing gentle pendulum swings or light range-of-motion moves. Watch your skin the whole time, and if pain climbs instead of easing, that’s your cue to call a doctor rather than push through another round.
Get the Right Tool for the Job
Following the timing and coverage rules above only works if the wrap you’re using actually fits the joint. A lot of standard ice packs are built for flat surfaces like a knee or a back, which leaves your shoulder’s front and back inflammation half-treated no matter how disciplined you are with your timer.
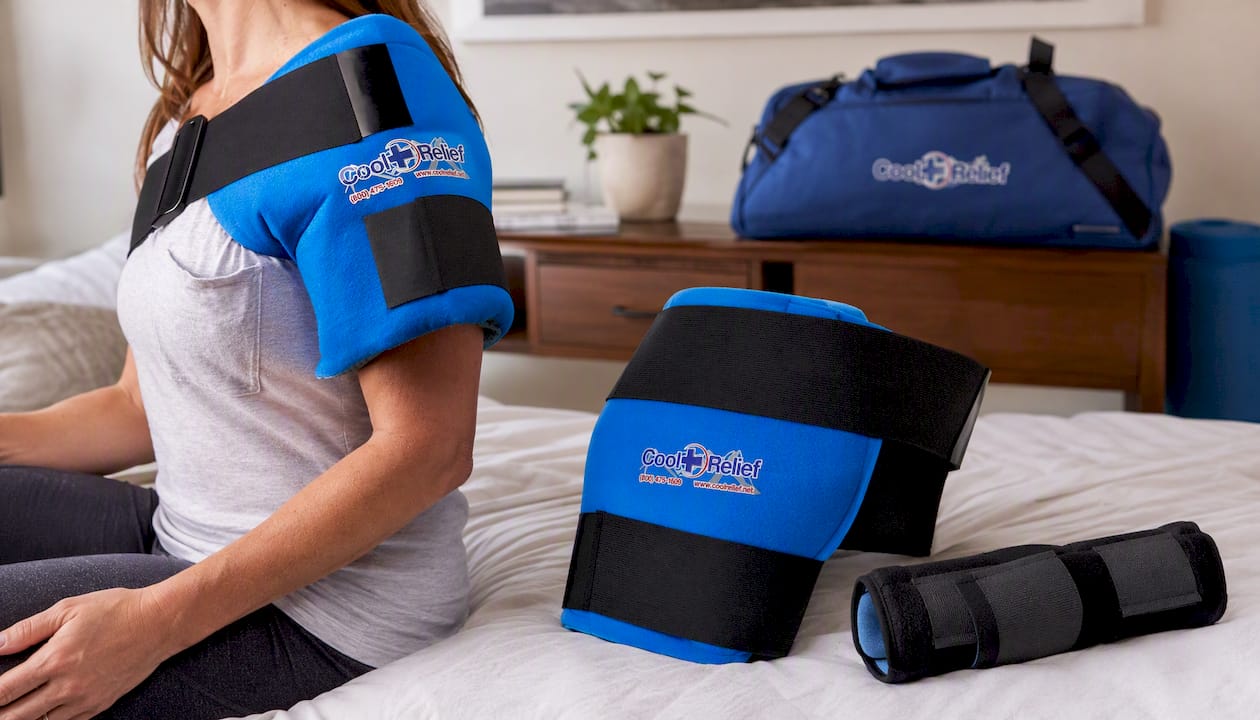
The Soft Gel Shoulder Ice Wrap is shaped specifically to wrap around the joint, so cold or heat reaches the subacromial space instead of just the surface. The soft gel inside stays flexible even when frozen, contouring to your shoulder instead of pressing flat against it, and it comes with an insulating layer built in, so you’re not hunting for a spare towel every time you ice. It’s refreezable, adjustable with straps that hold it in place through movement, and easy to rinse clean between uses.
If you’re dealing with pain in more than one joint, Cool Relief carries the same soft gel technology in a Soft Gel Hip Ice Pack and a Wrist Ice Pack, so you can treat whatever’s bothering you with the same reliable setup. Check the sizing guide on each product page to make sure the strap length fits your frame before you order, and toss the gel insert in the freezer as soon as it arrives so it’s ready the next time you need it.
A Few More Reliable Reads
For deeper background on conservative shoulder care, Harvard Health’s shoulder pain overview is a solid starting point. MedlinePlus’s rotator cuff self-care instructions walk through home treatment step by step, and Johns Hopkins Medicine’s comparison of ice packs and warm compresses breaks down exactly how each therapy works on pain.
This article is general information, not a substitute for advice from a qualified doctor. Consult a qualified healthcare professional about your own circumstances before acting on anything here.
Sources
- Harvard Health: Shoulder pain
- MedlinePlus: Rotator cuff - self-care
- Johns Hopkins Medicine: Ice packs vs warm compresses for pain
FAQ
Is heat or ice better for shoulder pain?
Ice works best for fresh swelling and acute pain, while heat is better suited to chronic stiffness and muscle tightness once inflammation has settled down, usually after about 72 hours.
What is the fastest way to relieve shoulder pain?
Icing the shoulder for 15 to 20 minutes with a barrier between the pack and your skin is typically the quickest way to dull pain and reduce swelling in the first day or two after it starts.
Why is ice no longer recommended for injuries?
Ice hasn’t been ruled out. Major clinical sources still recommend it for acute swelling and pain, though guidance has shifted toward shorter, more limited sessions (15 to 20 minutes) rather than prolonged or continuous icing.
Does frozen shoulder feel like a torn rotator cuff?
Both can cause pain and limited motion, but frozen shoulder tends to bring a more constant, all-over stiffness, while a rotator cuff tear often causes sharper pain with specific movements like lifting or reaching overhead. A doctor’s exam is the only reliable way to tell them apart.
— Cool Relief
Share and get 15% off!
Simply share this product on one of the following social networks and you will unlock 15% off!